Tutorial Tuesday: Soft Focus Backgrounds in Painter
 I do a lot of portraits, and learned early on that a quick and dirty background can really add a lot to a portrait. Since the focus is mostly going to be on the face, however, you don’t want to draw too much attention to the background (unless, of course, it’s integral to the character). Up close backgrounds require a lot of detail, but if you want to do a far distant background, something in a soft focus (think Glamour Shots 😉 that hints at detail without actually giving it, is a nice way to back your character portraits. Incidentally, they’re also not bad for learning to control your brushes without agonizing over detail and too much brush control.
I used the technique I’m about to show you in my Autumn Prince painting, just for an example. It’s also not a bad way to start the far distant ground of a forest painting. Keep in mind, the closer the viewer is to the object, the more in focus it needs to be, so this won’t work for foreground objects. Those you really do need to spend time on the details. This technique is really easy, and only requires two brushes to do.
If you want to view the steps larger, click and they will open in a new window.
1. Open up Painter, and start a blank canvas, somewhere over 2000 pixels in width and height. I’ll leave the precise dimensions up to you. Dropper in a black background on the canvas layer, and make sure that “Preserve Transparency” is UNchecked, and that “Pick up Underlying color” is checked.
 2. Add a new layer. For this step you’ll need the “Soft Airbrush 30”. In the brush options
  bar at the top of the screen, change the percentages to:
Size=240, Opacity=4%, Resat=73%, Bleed and Jitter=0%

Pick four colors. Using these, sort of softly scribble in a “glowy” background. Leave a dark area for the ground area, and some shadowy areas at the top. We want this to look like a magically glowing glade in the forest.
 3. Add a layer. Resize your brush and block in some bushy shapes in one or two
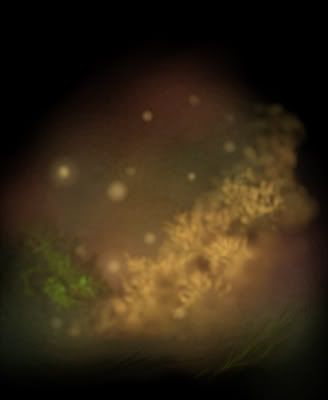 colors, slightly lighter than the ones you used for the background. Layer medium to small blotches over one another to make leaves. Remember that bushes have depth and volume, and some areas are recessed and in shadow. Work large to small on your blotches. The farther away a bunch of leaves are, the bigger the brush size. The ones closest to you, use the smaller scale. The color will layer and saturate as you go, so you don’t need to play with the opacity.Add some glowing fairy lights using the same brush and a lighter yellow. Draw a large, soft spot with low pen pressure. Then downsize the brush and go over the middle of the spot again.
 4. Add a layer. Same airbrush still, only this time, drop it down to only about size 5 or 6.
 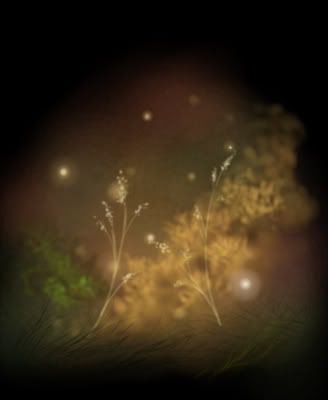 Use a very light yellow to softly draw some stalky plants, and give it some little tiny leaves or berries at the ends of the branches. Use an almost white version of the same color to touch up the leaves, and to add small glowing bright centers to your fairy lights. Eyedropper your background colors and sketch in some loose long grass, starting with green, and then layering the black background over it for some shadowy grass in the front.
 5. Add a layer. Time to switch brushes. This time select the
 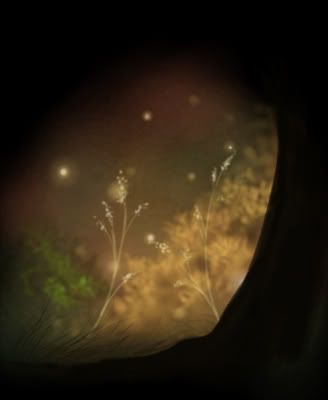 “Round Oil Pastel 30” brush. Change the settings as follows: Size=19, Opacity=7%, Grain=100%, Resat=14%, Bleed=90%, Jitter=0%.Since the tree is mostly backlight, we’re going to block it in using the same black as the background. Just draw it in near the edge of the canvas (it bleeds off, here) and over what you’ve already done.

6. Add a layer. Same Oil Pastel brush, downsized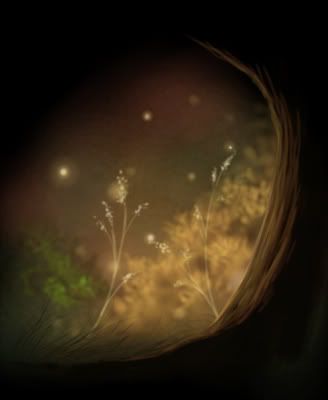 to around 5 or 6. Do some color picking straight from your painting (hold down the “Alt” key for a quick eyedropper). Work from the outer edge of the tree with the lighter colors, in to themiddle with the darker colors. Layer strokes over other strokes to get a rough bark texture.
7. And there you have it! Feel free to go back in and add in some green grass strokes near your tree if you need to, or to detail little pieces here and there. Remember, if you’re doing a portrait that a lot of this is going to get covered up, so don’t labor over details until you’re certain they’ll be visible around your character.
Tutorials are copyrighted as well. Please do not repost or reprint without my permission. Contact me at mercuralis@wickedeyedesigns.com for information.


I just love your artwork you have a great talent.
Hi there,
You are my savior where painting backgrounds is concerned, thank you so much for this tutorial. I love your artwork although I just came upon your site on DA today, but believe me, you got a serious fan and supporter. Congratulations on your features in Exotique. You deserve it as your work is of the highest quality and excellence. And I truly hope to learn more from you.
Regards
Alta (AlleyCatz on DA)